Forms and Events
Forms

Forms are a way to gather data from the user, by entering a text or choosing from several options, data is gathered and stored so the web app can process it and show a page content based on the outcome.
There are many types of forms you can use, and each one is used for different purpose, forms are always tagged with <form> and it should always carry the action attribute and will usually have a method and id attribute too. Every form element requires an action attribute. Its value is the URL for the page on the server that will receive the information in the form when it is submitted.
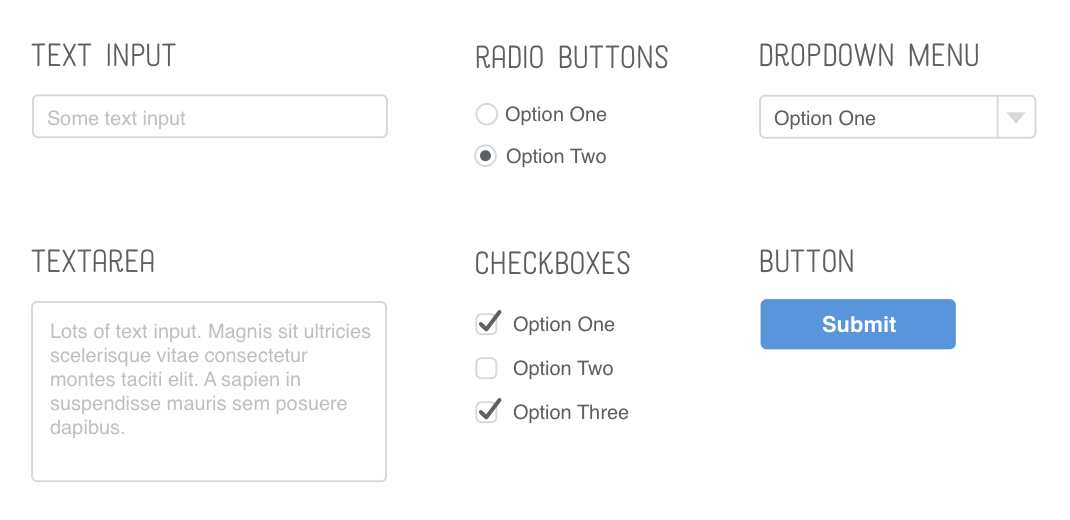
You can use the <input> to create several different form controls. The value of the type attribute determines what kind of input they will be creating.
Types:
- type=”text”: creates a singleline text input.
- type=”password”: creates a text box that acts just like a single-line text input, except the characters are blocked out.
- type=”radio”: Radio buttons allow users to pick just one of a number of options.
- type=”checkbox”: Checkboxes allow users to select (and unselect) one or more options in answer to a question
-
type=”file”: creates a box that looks like a text input followed by a browse button. When the user clicks on the browse button, a window opens up that allows them to select a file from their computer to be uploaded to the website.
- type=”submit”: The submit button is used to send a form to the server.
- type=”date”: give the type attribute a value of date.
- type=”email”: email entry.
- type=”search”: create a single line text box for search queries.
You can use <select> to create a drop down list box, by wrapping a set of <option> tags.
<fieldset> allows you to group a set of forms together, and show the fieldset with a line around the edge to show how they are related. And then use <legend> to give this group a name.
You can style Forms using CSS, there are many options you can use to make the forms go along with the page style and to be more readable, you can control the colors of the boxes and the width for each box or button as well as styling the fieldset and align it with the rest of the page components.
Events
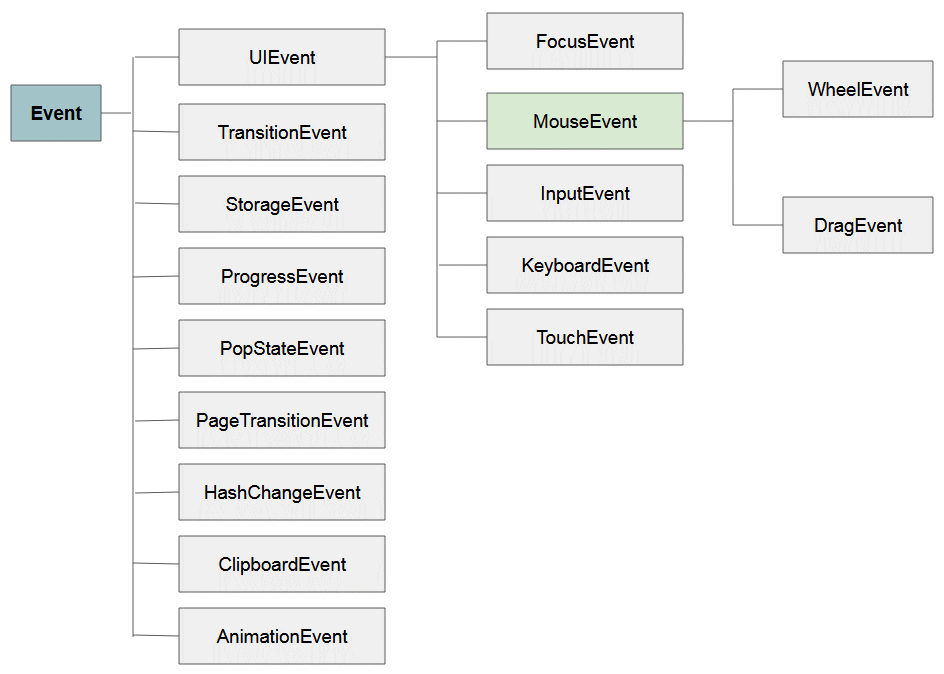
HTML events are the actions that are applied on HTML elements, they are applied by a set of codes that take the inputs from the user.
When JavaScript file is attached to the HTML page, JavaScript can apply codes on these events. An HTML event can be something the browser does, or something a user does.
Examples of HTML events:
- Web page has finished loading
- An input field was changed
- button was clicked
HTML allows event handler attributes, with JavaScript code, to be added to HTML elements.
With single quotes: <element event='some JavaScript'>
With double quotes:<element event="some JavaScript">
Here is a list of some common HTML events:
- onchange An element has been changed.
- onclick The user clicks on an element.
- onmouseover The user moves the mouse over an element.
- onmouseout The user moves the mouse away from an element.
- onkeydown The user pushes a keyboard key.
- onload The browser has finished loading the page.
What can JavaScript Do? Event handlers can be used to handle and verify user input, user actions, and browser actions:
- codes that should be applied every time a page loads.
- codes that should be applied when the page is closed.
- codes that should run or triggered when a user clicks a button.
- data that should be verified when a user inputs them.
Many different methods can be used to let JavaScript work with events:
- HTML event attributes can execute JavaScript code directly.
- HTML event attributes can call JavaScript functions.
- You can assign your own event handler functions to an elements.
- You can prevent events from being sent or being handled.

Get back to EMAM’S HOMEPAGE
I have created this page as a part of my project using Github, Please visit my profile, I will be more than happy to hear from you all. © Emam Shararah 2021